Showing posts with label ADF. Show all posts

Tuesday, August 22, 2017

ADF how to deploy an application

Creating an EAR


First you must change the connection type of the database into "JDBC Data Source" from
"JDBC URL" in the configurations of "AppModule".

Then right click on the Application drop down and select Application properties.
Then  expand Deployment and you'll find "Weblogic", select it. Then uncheck the box "Auto Generate and Synchronize weblogic-jdbc.xml Descriptors During Deployment" and click "OK".
Then expand Run and you'll find "Weblogic", select it. Then select "Fast Swap"and click "OK" 

Then right click on the Model in project tabs and select Deploy and wait until deployment is over
then click "Application" tab and select deploy and in the popup select "Deploy to EAR" and select "OK" then wait until the deployment is over. 

Go to the resource folder where your application is initially saved, there you can find a new folder named "deploy" is created, inside that you can find the EAR you created

Wednesday, February 22, 2017

Java ADF creating EO and VO

After creating a Data Base connection,

Click the 'Applications Window options' and change the Package level to '1'
Right click on Test Modal and create a new 'Entity Object'

Click 'OK'

Give a name to the entity object

Type Testmodel.eo for the package name. This creates a package named eo 
inside the package Testmodel. Then click 'Browse' following to Schema
Object

You can choose the data base you connected earlier from the Database schema
list Then  click Query and select the required table and double click then press
'OK'

Click 'Next'

Click 'Next'

Select the attribute for the primary key and tick the Primary key check box
and click 'Next'

Click ' Next'

Click 'Next'

Click 'Finish'


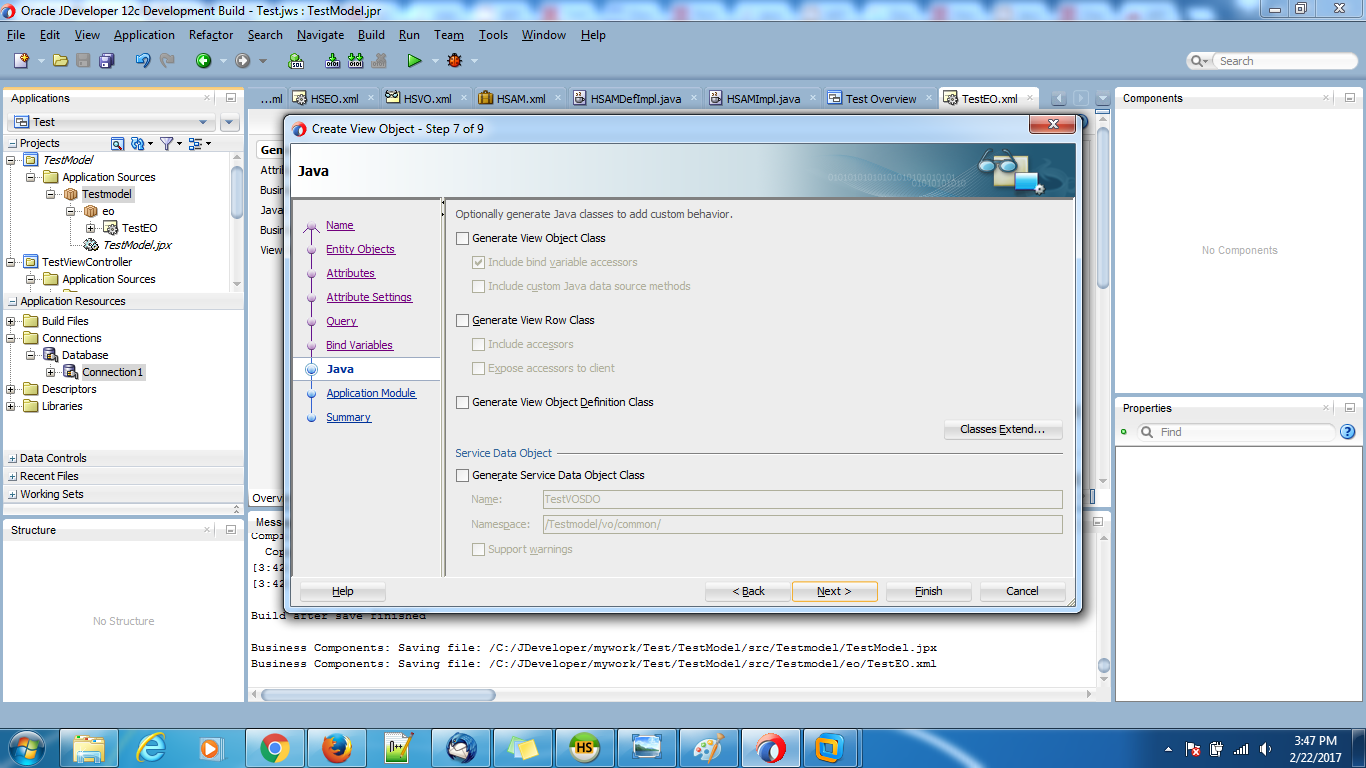
Right click on Test Modal and create a new 'View Object'

Give a name to the view object and type Testmodel.vo for the package
name. This creates a package named vo 
inside the package Testmodel.
Then click 'Next'

Double click 'TestEO' to select it

Click 'Next'

Double click the data base table fields to select them

Click 'Next'

Click 'Next'

Double click to select

Click 'Next'
Click 'Next'

Click 'Next'

Click 'Next'

Click 'Finish'
Creating EO and VO is complete

Monday, February 20, 2017

Java ADF connecting to a Data Base

When you open Oracle JDeveloper Studio you will be prompted to the following screen

Select Connect to a Data Base


Select 'Create a Data Base Connection'
Give a name to your connection
Select the connection  type you use. Here we are using a MySql Data Base
Type the username and the password and give the Data Base name. Then
test the connection and press 'Ok' , if the connection is unsuccessful
check the username, password and the Data Base name 
Click the not started button and change it to 'Done'

Thursday, February 16, 2017

Java ADF surfing through pages using buttons

Open 'Oracle JDeveloper Studio' by double clicking on the icon.

Select Studio Developer (All Features) and press 'Ok'. 


Press 'Finish'


We need to create a folder before creating page fragments.

Select from gallery


Add a folder name and press 'Ok'.


 Then create page fragments.


Here we are studying the connection between two pages
therefore we need to create two page fragments.
Change the file name and press 'Ok'.


At the components panel search 'panel box' then drag and drop a panel box
onto the page fragment. 


Then drag and drop a button from the panel 'General Controls'.

You can change the names of the button and the panel box at
the 'Common' tab.
Then go to page flow in web content (in Applications tab) and create a
ADF Task Flow.


Drag and drop the two page fragments you created earlier on to the
ADF Task Flow. The fist page is highlighted in green while the other is not.


Select Control Flow Case from Components tab and draw arrows from
one page to the other, it shows the way that the buttons work when clicked.


Then go to a page fragment you created before and tap on the
button once. Then from the Button.next.properties tab you
need to change the action of the button.
Select Edit.


Change the scope name to pageFlow and press 'Ok'.

Then add a Method name


 Then go to a page fragment and double click on the button.
(Do this for both pages)
Change return NULL to the String you provided for the control flow lines,
 the name must be within double cotes("") because it's a String 

Now we need to create a page
Click from gallery

Select JSF/Facelets from categories and select page

You add a name to the page.

Then drag and drop the task-flow-definition.xml on to the page created above
and select Region.


Right click on the page and click Run


A page opens in a browser.


Click on next button